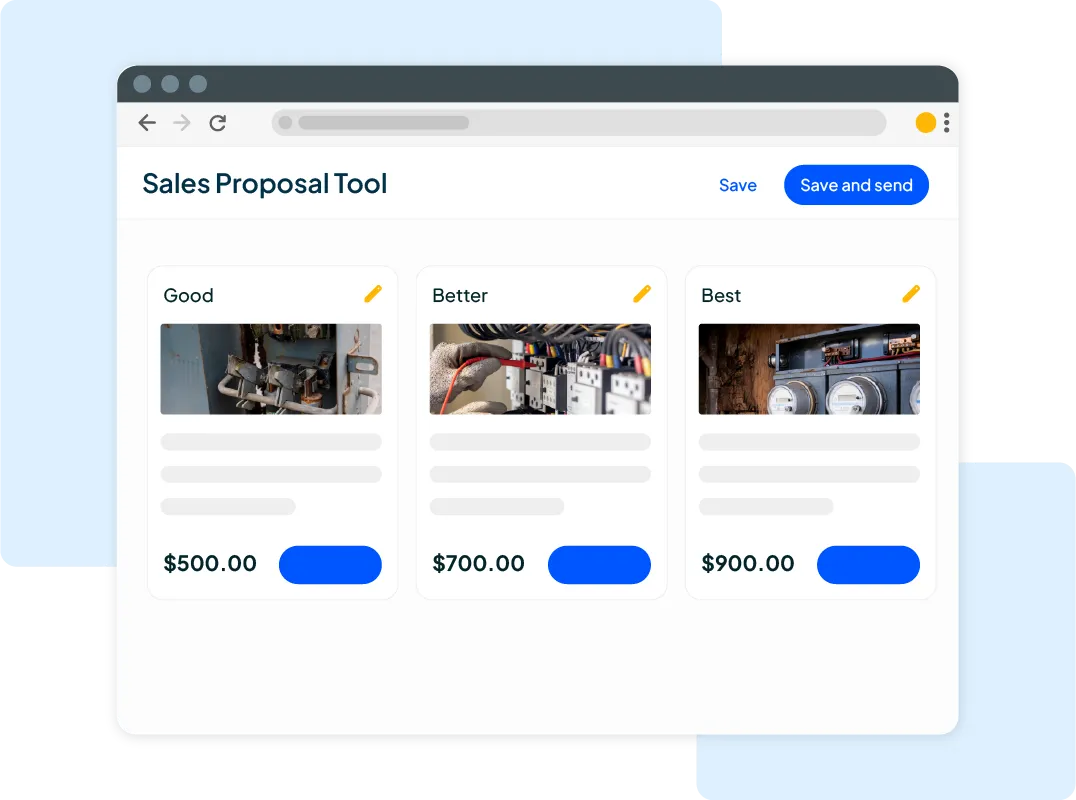
Want to win more jobs with less effort?
Grow your business and send quick quotes with our home service software.

Want to see your potential revenue?
See what businesses like yours earn with Housecall Pro in 1 - 2 minutes.

A vinyl car wrap is a great way to temporarily change a vehicle’s appearance. If you’re a savvy small business owner, you can use a vinyl car wrap for custom advertising to attract new customers and increase your brand visibility in a crowded marketplace.
Jump ahead to each section
- How Do I Know When to Remove a Car Wrap?
- How Long Do Vehicle Wraps Last?
- Can You Remove a Car Wrap Yourself?
- Is Removing a Car Wrap Difficult?
- Does Removing a Car Wrap Damage Paint?
- Car Wrap Removal Tips
- What to Avoid When Removing a Vinyl Car Wrap
- How to Remove a Vinyl Car Wrap without Damage
- Step 1: Prepare Your Vehicle For Vinyl Car Wrap Removal
- Step 2: Gather The Tools Needed for Vehicle Wrap Removal
- Step 3: Apply a Graphic and Adhesive Remover if Desired
- Step 4: Begin Peeling the Car Wrap
- Step 5: Remain Consistent While Peeling
- Step 6: Use a Vinyl Wrap Adhesive Remover Spray to Remove Residue
- How to Care for a New Vinyl Car Wrap
- To Wrap It All Up
How Do I Know When to Remove a Car Wrap?
The car wrap on your vehicle isn’t going to last forever. It’s like a new outfit. It looks great initially, but it starts to show its age after a while. The same thing happens with car wraps. After a few years, the wrap can look rough around the edges with curls, peels, color fading, and cracks.
When the car wrap starts to fade or the material cracks and peels, it’s a sign that it’s time to remove that old wrap and give your car a fresh new look. Another clue is if the wrap is just not sticking like it used to. The edges may be starting to lift, or you can see the original paint peeking through in spots. That’s a telltale sign that the wrap is on its last legs and needs to go.
How Long Do Vehicle Wraps Last?
The lifespan of a wrap runs from 5 to 7 years—depending on how well you take care of it and variables like weather and where the vehicle is stored. Maybe you inherited a car with a vinyl wrap, or you already have a wrap on your work truck that’s starting to look a little sad with abrasions, lifted edges, and weathering. If so, it’s time to begin the car wrap removal process. After all, the longer you leave it on, the more complex the wrap will be to remove.
Below, we’ll explain the DIY steps on how to remove car wrap as well as how to make your new vinyl wrap stand out from the competition. Keep reading for a comprehensive overview (important), or skip to the section you want to know more about.
Can You Remove a Car Wrap Yourself?
Anyone can remove a car wrap. You just have to know how to do it without causing any damage. On the other hand, car wraps are relatively simple to remove. The process just requires a little patience and specific techniques.
Is Removing a Car Wrap Difficult?
Removing a car wrap can be difficult depending on how long it was on the vehicle, how you took care of it, and how the outdoor weather affects it. Generally speaking, a wrap on a car, truck, or van for one year or less will be easier to remove than one attached for two to three years. Car wraps on a vehicle for three years can be slightly challenging to remove, but it still is easy if you have patience and the right tools. Vinyl becomes brittle over time, so eliminating ten-year adhesion will be challenging, but the necessary tools make the job much easier and quicker.
Does Removing a Car Wrap Damage Paint?
Car wraps can damage paint if the vehicle has rust spots or aged surfaces. Installing vinyl wraps on new, clean surfaces is always best to preserve them longer. You may encounter the need to touch up painted areas on some vehicles. Still, it generally occurs around edges and corners, especially bottom ones with increased exposure to outdoor elements, such as salt, rain, mud, gravel, etc.
“Proper vinyl wrap removal is just as important as the installation”, says Nick Vitucci, Head of Marketing at Leto Graphics. “Using the right heat and tools ensures the vehicle’s paint underneath stays intact and clean. If it’s not done correctly, not only can you damage the surface, but you’ll also be left with stubborn adhesive residue that takes extra time and effort to remove. Rushing the process can lead to damage and costly repairs.”
Car Wrap Removal Tips
Before tackling the steps of vinyl car wrap removal, you should review some valuable tips to make your task easier and quicker.
Inspect The Car Wrap’s Quality to Determine Time Needed for Removal
One key element that will affect the difficulty level of the car wrap removal process is the actual type of vinyl used. Aged or off-brand vinyl will make the wrap removal process more unpredictable and possibly more expensive. It’s a case of “you get what you pay for.”
Identifying the quality of the car wrap allows you to determine how long it will take to remove it and allow you to plan for it.
1. Inspect for Damage
Inspect the wrap on the surface to look for damage. Cheaper wraps may be more susceptible to impacts. If you see many damaged areas, the wrap is likely of lower quality. The damage can include a high level of cracks, scratch openings, dings, holes, and other damage that lets moisture and other elements into the car’s surface, making the removal a fragile process for the paint.
Companies that create cheaper vinyl automotive wraps are more concerned about selling high volume.
Big-name vinyl companies, such as AVVID, charge a premium for automotive vehicle wraps because their research and development processes are much more robust.
These companies have incentives to protect their brand’s reputation and the perceived/actual value in the marketplace. Their products generally have a more robust defense against chipping, scratching, cracking, etc.
2. Remove and Inspect a Section That’s Easy to Access.
Find an easy-to-access section you don’t mind removing, and pay attention as you remove it.
Does it tear a lot? Better-quality wraps won’t tear as easily, but they will still tear. Removal will be quicker on higher-quality wraps because you’ll peel more off each time before it tears.
Does it feel super thin? While you peel the car wrap, you’ll see how thin and flexible it is. Higher-quality wraps will flex and stretch less and appear less flimsy. They’ll have a thicker feeling to them. Cheap wraps can feel like thin kitchen plastic wrap, while good-quality car wraps will feel like pulling on a pricier sandwich bag. Higher-quality wraps will allow more to peel off at a time, cutting the task’s time in half.
Cheaper wraps may take 6-8 hours to remove when partial and 8-10 for full car wraps. Higher-quality partial wraps can take 3-5 hours, while full wraps range around 6-8 hours.
Does it chip a lot when pulled on? If the car wrap chips quite a bit when you peel it, it means it has been on the vehicle for an extended period, such as 8-10 years. You’ll need to plan additional removal time for “about” an extra 2-4 hours on a partial wrap and 3-5 hours on a full wrap. This timeframe includes adhesive removal around the chipped areas when pulled.
3. Determine the Difficulty Level
Wraps sitting on a shelf for several years may be more brittle and age quicker when they wrap your car, making removal challenging and time-consuming. If the car wrap also chips off in small flakes or takes too much effort to remove, leave the job to professionals.
If the vinyl comes off easily once you apply heat, you’re in good shape to do the task yourself. In worst-case scenarios, you may encounter some problematic areas, extending the time you spend removing the car wrap.
What to Avoid When Removing a Vinyl Car Wrap
You want to avoid some things when removing custom vinyl car wraps. It’s like when you must repaint a car or work on an outdoor electrical project.
- Don’t remove car wraps in cold temperatures: The ideal temperature is at least 60 degrees. You can also perform the task indoors in a temperature-controlled environment.
- Avoid direct sunlight. The sun dramatically affects the vinyl material and softens the adhesive, so some remains on the surface as you pull the wrap off. It also causes removal difficulties because the sun shines on specific zones while it doesn’t in other areas, leading to variable removal challenges.
- Avoid adverse weather conditions: Don’t attempt to remove the car wrap if it’s raining and windy unless you are doing it indoors. The rain can make removal difficult, and the wind can blow the loose wrap around, making it challenging to handle. It’s like pitching a tent on a windy day. You want as much wrap loose as possible without it tearing. If it’s blowing everywhere, you face a challenge.
- Avoid pulling the wrap at a 40-degree or higher angle: You’ll experience more tears and leave more adhesive on the vehicle than you would if pulling the wrap at 25 to 40 degrees. Most manufacturers specify the recommended angle range.
How to Remove a Vinyl Car Wrap without Damage
Removing a partial or full car wrap may seem simple, but you should be cautious and take your time to avoid peeling any paint or the clear coat. Materials and finish imperfections also play a role (fiberglass bumper, aluminum, chrome, exterior plastic window trim, not-so-painted edges, cracks in the body’s folds, rusted areas, and more).
Step 1: Prepare Your Vehicle For Vinyl Car Wrap Removal
You should clean and completely dry your vehicle(s) before removing the full or partial car wrap.
Step 2: Gather The Tools Needed for Vehicle Wrap Removal
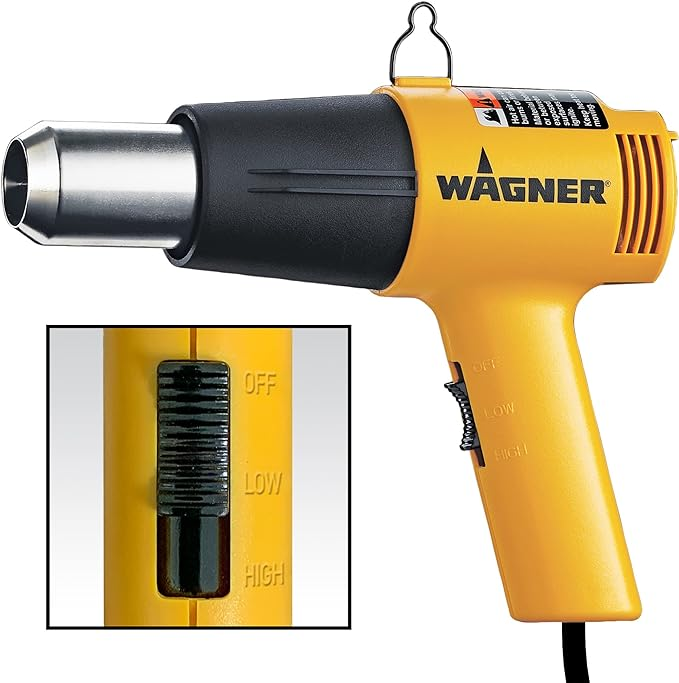
- Heat gun: Use it to soften and detach vinyl wrap from the vehicle’s surface.
- Plastic Razor Blade Scrapers: Use them to lift the wrap in stubborn areas and scrape off the adhesive when using an adhesive remover.

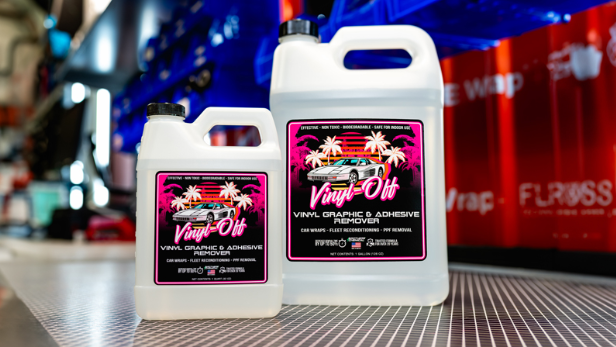
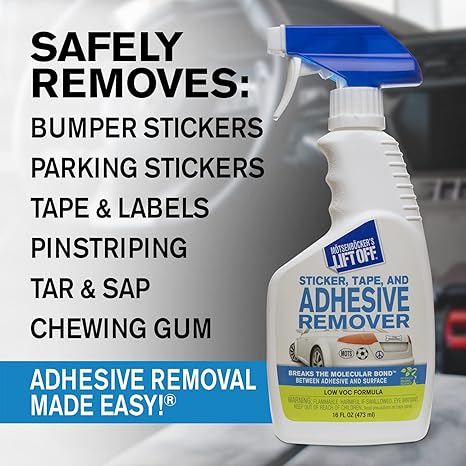
- Vinyl Graphic and Adhesive Remover: Apply it to the wrap and remove it, along with the adhesive, in one step.
- Adhesive Remover Spray: Spray over residual adhesive on the vehicle’s surface, then scrape it away with the plastic razor blade.
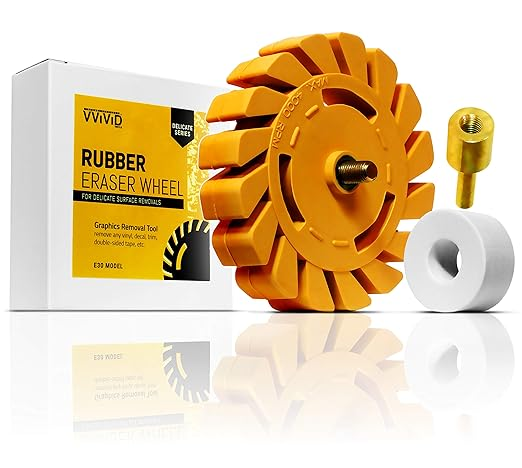
- Optional Stripe/Pinstripe Removal Tool: If you’re trying to remove vinyl wrap from a fleet of vehicles, you may want to invest in an electric drill/rotary/pneumatic stripe removal tool. No adhesive sprays are necessary, but it is still good to have them on hand.
Step 3: Apply a Graphic and Adhesive Remover if Desired
To speed up the removal process, especially on wraps older than six years, apply graphic and adhesive remover to the wrap and let it soak according to the directions.
Step 4: Begin Peeling the Car Wrap
Pick a corner to remove the car wrap and start peeling until you can get your fingers on it. Continue peeling at a 25 to 40-degree angle until you have a small area peeled off the surface. Stop right there.
Step 5: Remain Consistent While Peeling
Keep your pulling pressure, angle, and speed consistent while peeling off the vinyl car wrap. Take extra care around deeply contoured areas of your car. If you experience resistance, you’ll need the heat gun.
Sway the heat gun left to right at a distance of 5-6 inches while still pulling the car wrap. The back-and-forth motion prevents overheating a particular spot. Overheating an area can cause bubbling and burning on the wrap, more adhesive on the car’s surface, and peeling of the car’s clear coat and paint. Heat the vinyl according to the manufacturer’s specifications, generally 65 degrees and up.
Don’t yank at the vinyl. Yanking could cause the vinyl to pull up with the adhesive left behind, which is incredibly difficult to remove. The hood is an excellent place to start, but if you want to tackle the more challenging stuff, go for the vinyl around the bumpers first.
Note: Some professional car wrap companies use a primer on the car’s surface to improve adhesion and speed up installation. You don’t need a primer to install a vinyl wrap properly. However, you may encounter it if a professional previously did the job.
If the professional used a primer, you’ll have difficulty removing the adhesive left behind. Unfortunately, a primer can also scratch or partially damage the paint during removal. You can use “plastic” razor blades. Slide under the vinyl and pry it up.
Step 6: Use a Vinyl Wrap Adhesive Remover Spray to Remove Residue
Once you fully or partially remove the car wrap, some leftover adhesive residue may remain. If this is the case, you can use an adhesive removal spray to help break it down. Follow the instructions on the can.
Get In Touch: 858-842-5746
Let us earn your trust
Housecall Pro handles the admin work for your service business so you can focus more on what you love.
On average, Pros increase monthly revenue generated through Housecall Pro by 35% after their first year.
See plan options and feature breakdown on our pricing page.
How to Care for a New Vinyl Car Wrap
3M, one of the largest vinyl companies in the business, offers a few tips on vinyl car wrap after-care.
Frequent Washing
No time is the time to neglect your car simply because it now has a protective layer. Like paint, a vinyl wrap can degrade if not cared for properly. Whenever there is apparent dirt or other debris on the vinyl, make sure that you clean it off immediately.
Where possible, spray water to rinse dirt and road particles. Use a wet, gentle detergent and a microfiber towel for spot-cleaning stains. Avoid wax and other finishing products on top of the vinyl.
Automated Car Washes
Although you can take a vinyl-wrapped car through a car wash, it’s best if it’s touched less. The scrub brushes can be too abrasive on the wrap and cause it to tear or peel at the edges. Furthermore, spray washes can blast car wraps, lifting the edges or loosening the adhesion. Be mindful of this before pulling into any old car wash. The safest option is to simply handwash your vehicle so you can clean it without the risk of scratches, lifting, or peeling.
Storage
If you leave your new vinyl-wrapped vehicle in the sun, it can quickly degrade in quality. If left out in the elements for too long, you’ll also see weathering in the hood, trunk lid, and roof.
A garage or shaded area is ideal for storing a vinyl-wrapped car. Dew or rain can contain acidic pollutants or smear existing chemicals (road chemicals, bug sprays, etc.) on the vehicle’s surface, so ensure you cover it during adverse weather.
If you don’t have a garage, you might want to protect your car wrap with a cover.
To Wrap It All Up
Removing a partial or full car wrap requires patience, tools, and elbow grease. Some tools and chemicals speed up the process, but you must still be cautious during removal. The clear coat and paint may still come off. Using the above preparation steps, you can predict how long it will take and how to remove the car wrap safely. It may be time-consuming, but your brand identification is essential.
Another thing you can do to save time and promote your business is to increase word-of-mouth advertising. What does that mean? By improving the efficiency of your business and increasing your time for more customers, you can also satisfy the ones you have. They’ll speak highly of your company and services.
How can you do that? Household Pro makes streamlined software to improve organization, business processes, and customer/client invoicing. Why not work simpler and grow smarter?
Housecall Pro software features:
- GPS Tracking Software:
- GPS tracking to monitor your vehicle’s locations and dispatch your team efficiently.
- GPS tracking to monitor your vehicle’s locations and dispatch your team efficiently.
- Payments and Invoicing:
- Quickly accept payments anywhere and automate invoices in a just few clicks.
- Quickly accept payments anywhere and automate invoices in a just few clicks.
- Reporting and Analytics:
- Access customizable business dashboards for performance metrics estimate conversion, technician productivity, and job profitability.
- Access customizable business dashboards for performance metrics estimate conversion, technician productivity, and job profitability.
- Integrated Voice System:
- Identify callers and streamline the intake process with VoIP and call tracking.
- Create custom call flows for optimal performance.
- Online Booking System:
- Capture more leads and help customers book appointments 24/7 directly from your website, social media pages, or Google Business Profile.
Before committing to a new vinyl wrap design, make sure to upload the before and after of your wrap in our Housecall Pro Facebook Group to show off and maybe get some good advice on what to do next!
Car wrap removal frequently asked questions
-
Can you just peel off a car wrap?
-
No, peeling off a car wrap requires caution and patience to prevent the paint or clear coat from getting removed. Car wraps adhere strongly and stick to the surface more the longer they remain. They also become brittle, requiring many peel cycles to get them completely off the surface.“Proper vinyl wrap removal is just as important as the installation”, says Nick Vitucci, Head of Marketing at Leto Graphics, “using the right heat and tools ensures the vehicle’s paint underneath stays intact and clean. If it’s not done correctly, not only can you damage the surface, but you’ll also be left with stubborn adhesive residue that takes extra time and effort to remove. Rushing the process can lead to damage and costly repairs.”
-
How do you remove a car wrap fast?
-
There is no official or genuine way to remove a car wrap fast, but you can utilize specific tools and processes to do it as quickly as possible. Use a graphic and adhesive solution on the car wrap to remove as much of both as possible when peeling the wrap. Peel the most accessible sections first. Use a plastic blade tool to lift the wrap off the surface when it becomes problematic. Purchase a residue remover wheel that attaches to a drill or pneumatic tool to remove all residual adhesive from the vehicle’s body.
-
What is the easiest way to remove vinyl car wrap?
-
There is no easy way to remove a vinyl car wrap, but you can make the job easier by getting some automotive decal and stripe remover solution and applying it to the wrap before removing it.
You can purchase a rubber decal remover wheel for your drill or pneumatic tool as the finishing touch. It blazes through the adhesive and any remaining car wrap material fast and efficiently. Just be sure to follow the directions. It’s smooth sailing once you get the RPM speed and the correct pressure applied to the surface